I’m going to risk sounding incredibly cliché and say that I can’t believe how fast this year has flown by! What?! We’re already halfway through December?!!!
Time really does fly when you’re busy (and having fun). I’ve been up to quite a lot this year and have not (regretfully) been keeping up my promise to myself to document it all. So, in the spirit of celebrating the past year and preparing for the new, I’ve put together a compilation of my crafting and creating endeavors from 2016. Enjoy!
iPad Lap Pillows
(technically 2015, but somehow it was never posted)


You’ve seen those weird triangular-shaped pillows in Sky Mall magazine or at Bed Bath & Beyond that claim to hoist up your iPad while you’re lounging around in your Forever Lazy on the couch, with no plans for your day…. Well I took that idea and made it WAY cuter, and personalized it for my Mom and Grandmother last year for Christmas. They both have larger iPads and love to sit in bed or on the couch reading, playing Candy Crush, shopping on JewelryTelevision.com, etc. Not only was this a fun project, but a great gift. It was also an easy way to break into pattern making (yep, this was a custom pattern).
……………………………………………………………………………..
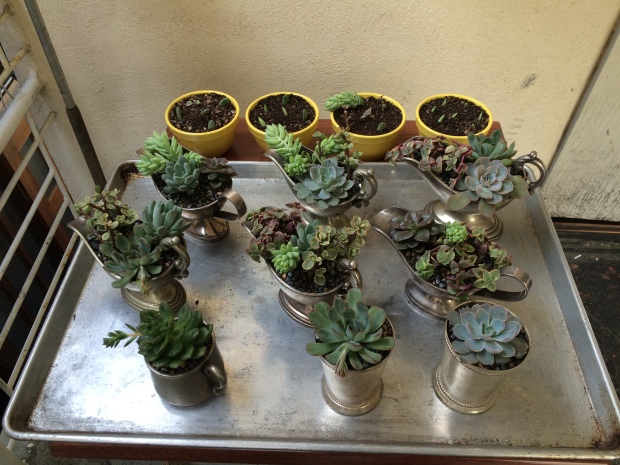
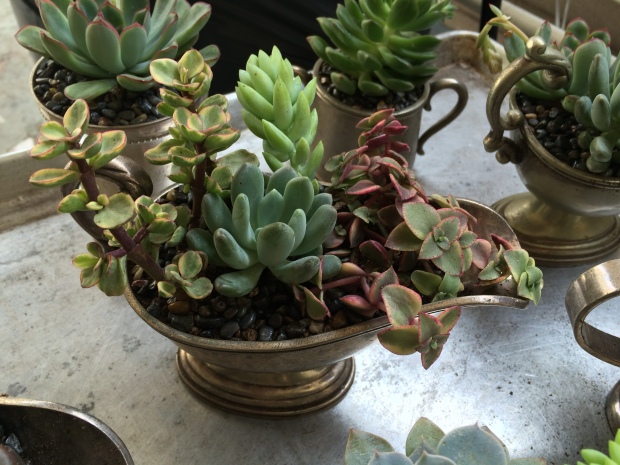
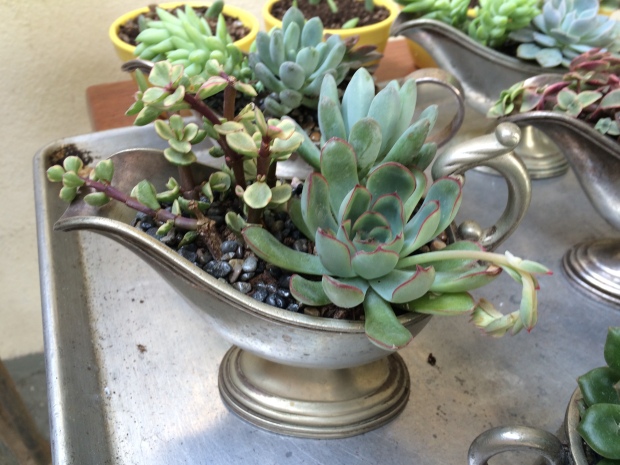
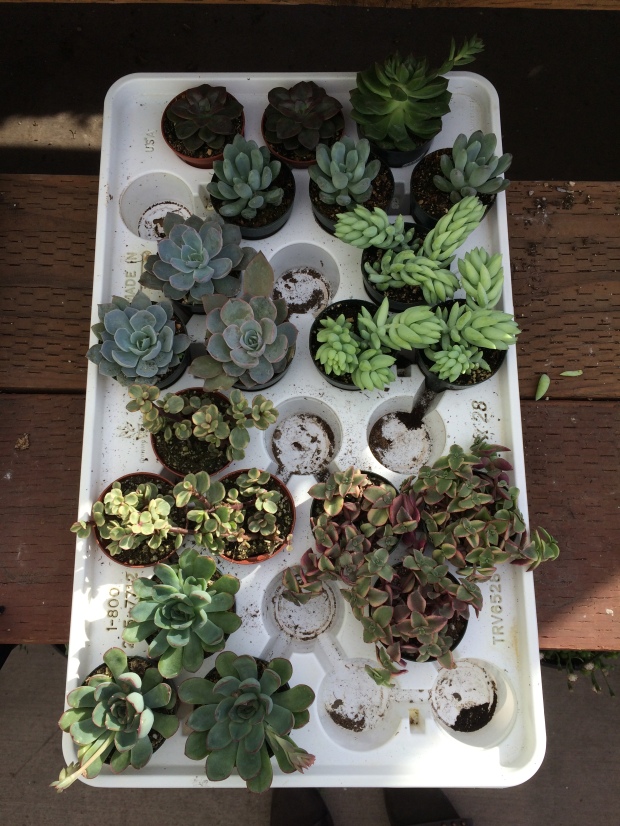
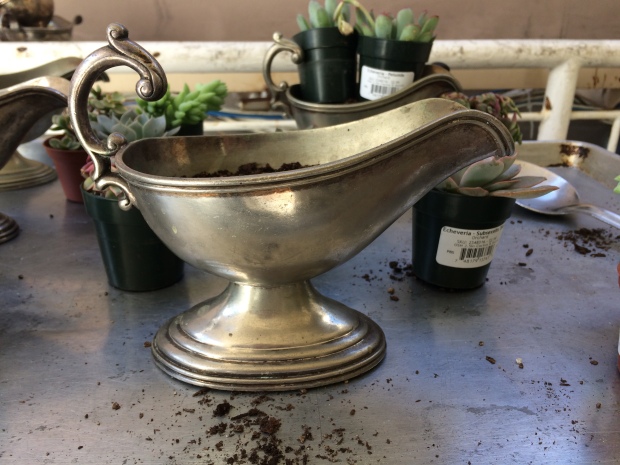
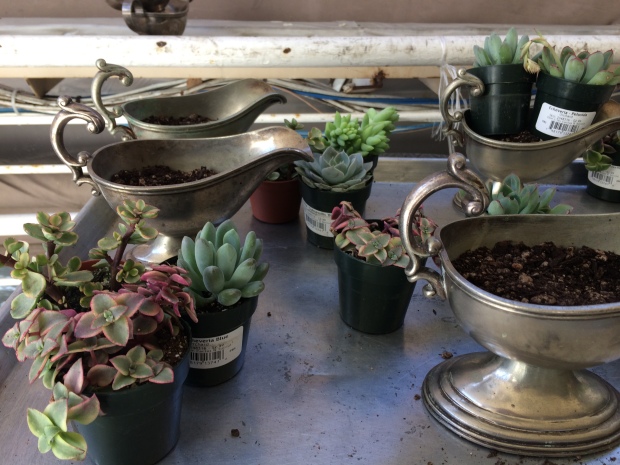
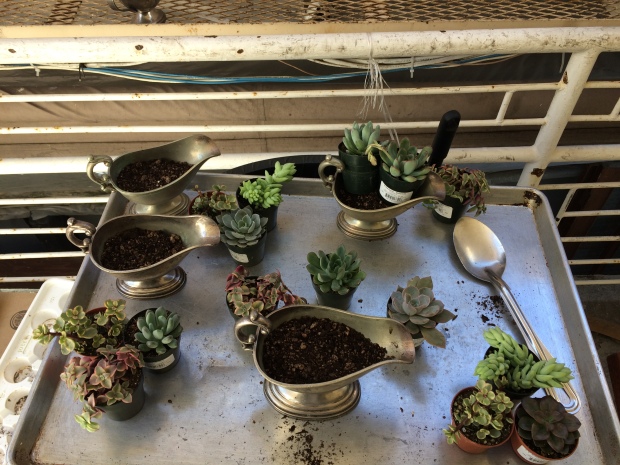
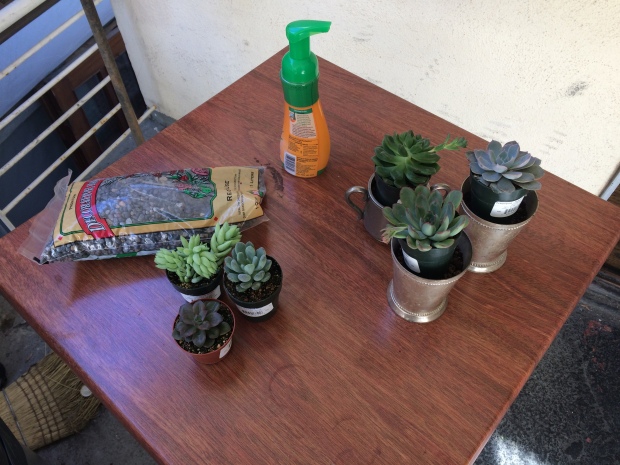
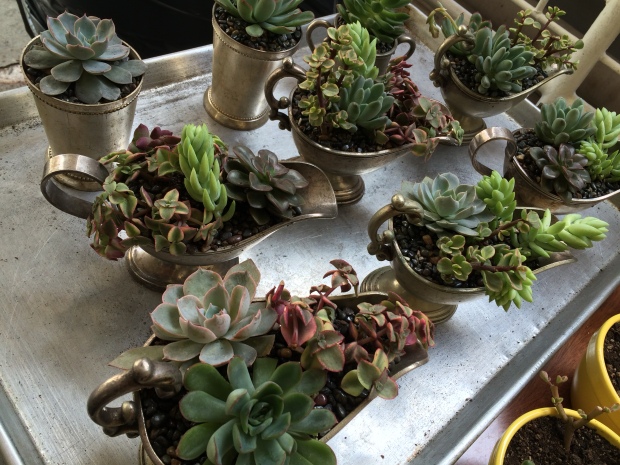
Succulent Babies!


Several months later, they are still thriving! This is not surprising for those who work with succulents on the regs. But for this Florida girl, who often forgets to water, these amazing desert plants make me feel like ALL my fingers are green. The donkey tails have grown to double their length, and the Perle von Nurnbergs are as pink as ever!
……………………………………………………………………………..
Our Gallery Wall


This was fun, but definitely took a while. I’m a perfectionist when it comes to permanent design, so you can imagine how long it took me to get the wall placement just right. I think the final product is fantastic though. Some of those pieces are mine, too!
……………………………………………………………………………..
Viking Beard

I made this at the request of a friend of mine…. It turned out pretty cool! I made that hat, too (2015). Thanks to my model, Kevin!
……………………………………………………………………………..
Silver 3-Tiered Cupcake Stand

This was something I crafted up for work, since I worked with several clients who requested a sweets table but we didn’t have anything cute to put the sweets on. I picked up a couple glass candlesticks from a thrift store and spray painted them silver. The three silver trays were already in our inventory but weren’t being used anymore so I repurposed them. We use this lovely stand ALL the time now!
……………………………………………………………………………..
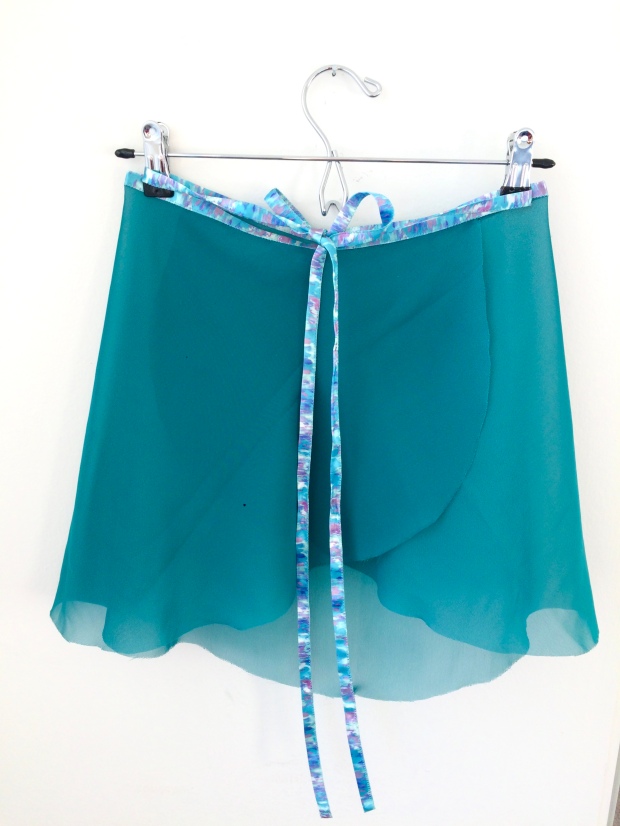
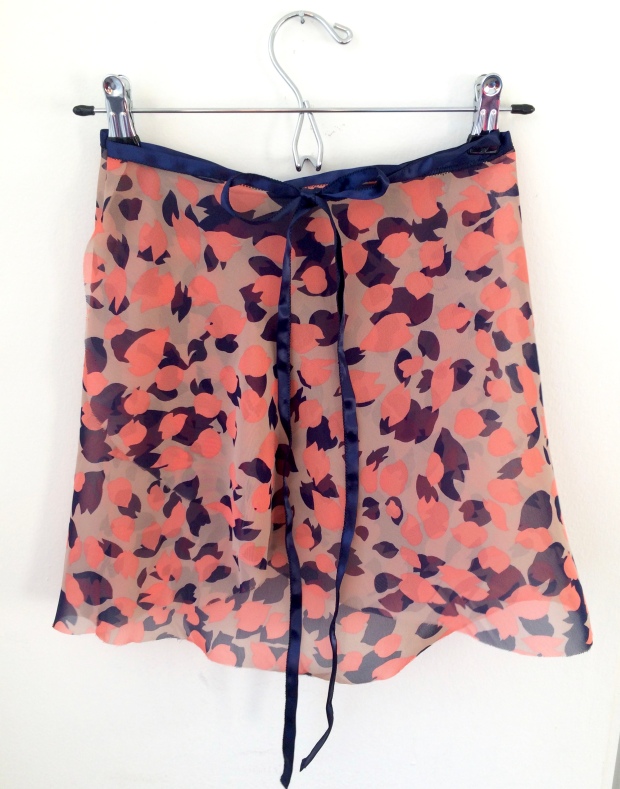
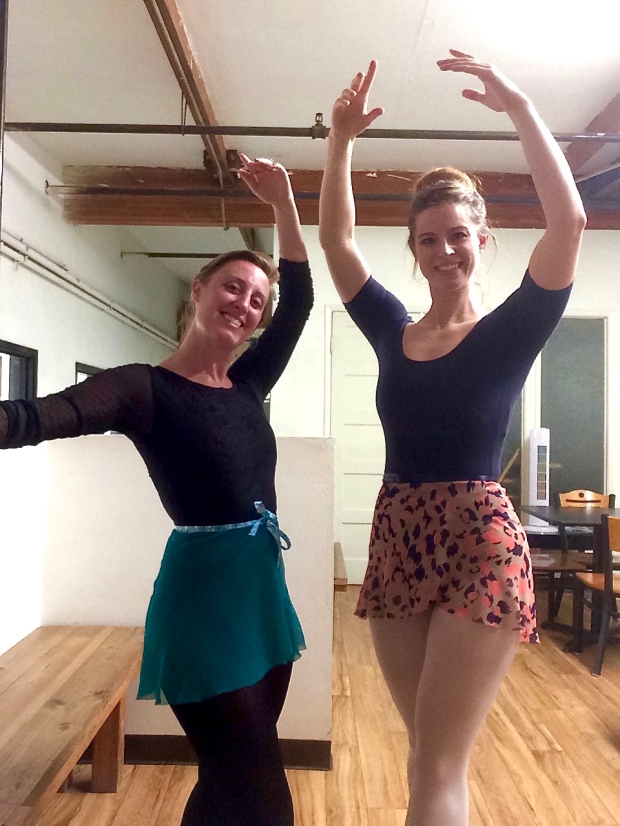
Ballet Wrap Skirts


I plan to make more of these, in varying lengths. They’re up in my etsy shop. I’m happy to whip up a custom skirt for you, just ask! 😉
……………………………………………………………………………..
Crop Top


I found this Nicole Miller fabric (very stretchy, like a scuba knit) @ Joann’s randomly and had to do something with it. This is actually the top half of a dress pattern I had that I altered slightly. This was a crazy project, because the pattern itself is WAY off and was so big the first time around, I had to go back into it (literally take it apart) and make it about 4 sizes smaller!
……………………………………………………………………………..
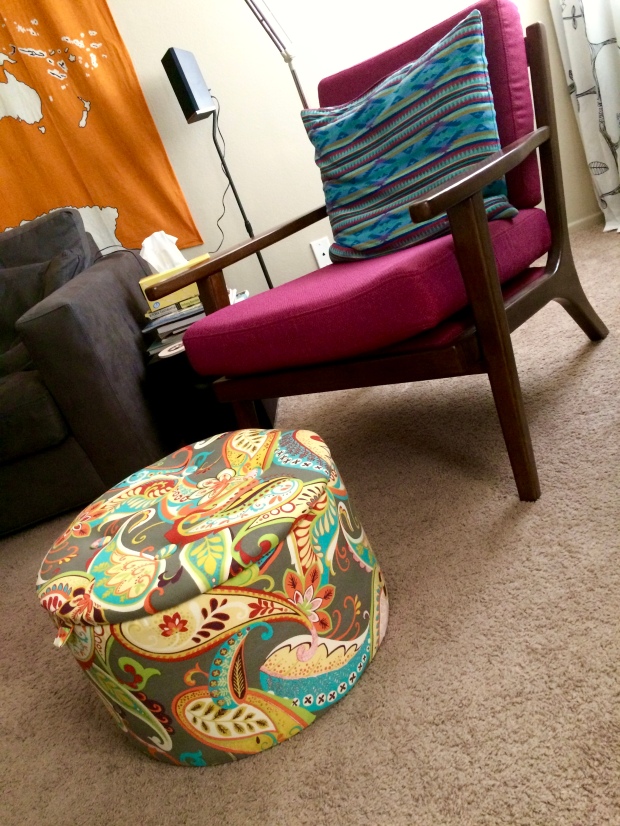
ReUp’d Ottoman


Y’all remember this one, right?! Freaking LOVE the pattern of this fabric.
……………………………………………………………………………..
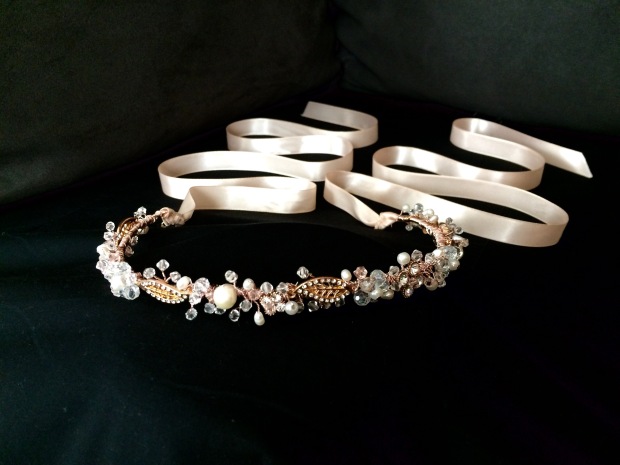
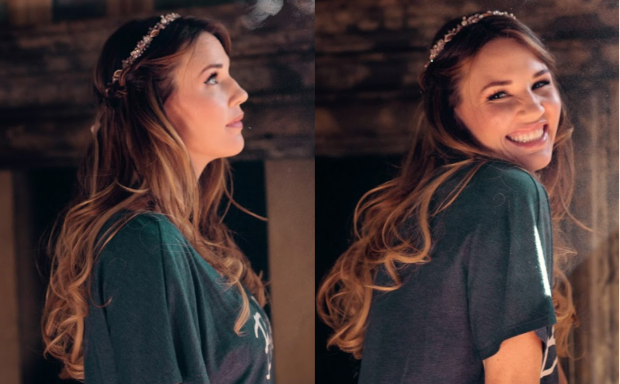
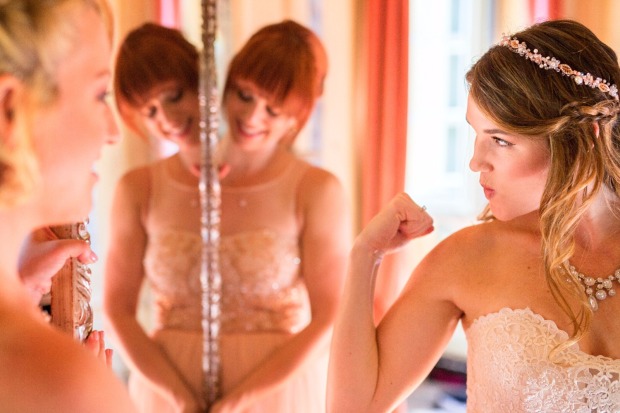
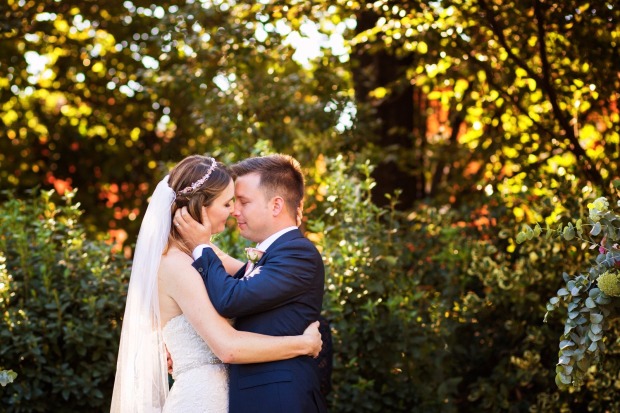
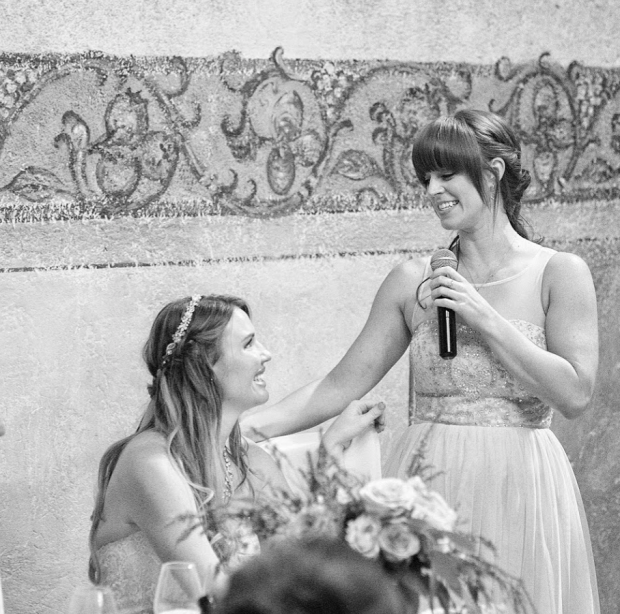
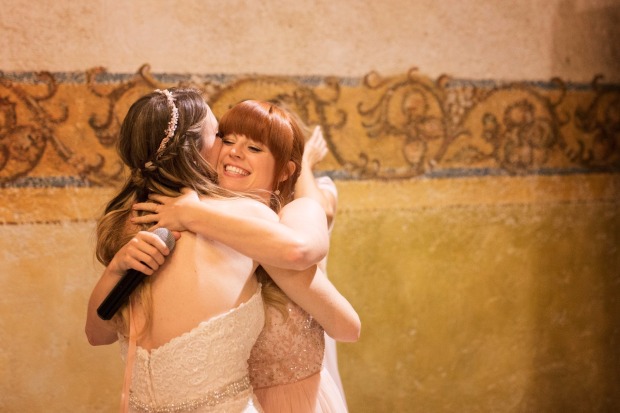
Hilaree’s Headpiece, Wristlets, and Bridesmaids’ Combs


As I did for my girl friend Megan, I do for Hilaree. She asked me to make her a bridal headpiece to match her 1920’s themed wedding and her gorgeous wedding dress. We shopped for the materials downtown and decided that we couldn’t stop with just the headpiece. I ended up making her wristlets (to add the illusion of long sleeves to her dress) and 6 coordinating combs for each of her bridesmaids (myself included). Stay tuned for the pro’s pictures….
……………………………………………………………………………..
Geometric MCM Dresser (WIP)

This is by far the most involved project I’ve taken on, probably EVER. Had I known it would be this intense… Nah, I still would’ve done it!
We live on a street where folks constantly put their unwanted furniture on the curb for the garbage collectors (or me) to take. I went out one morning to take Otis for a walk and found this guy on the curb and couldn’t say no.


It. Was. Disgusting. So gross, I couldn’t even take a picture of it in the condition we brought it inside in. While I was at work that day, Kevin took it upon himself to clean it because he couldn’t stand to have such a dirty piece of *$%! in the house. This pic is what it looked like when I got home and took a soapy sponge to the first large drawer. Yeah, just soap and water did ALL that. Gross.
I decided on a dark blue-gray color for the frame, and a fun, bright yellow-green for the geometric shape down the drawers. I sanded and stained the drawers a darker mahogany color (which was a pain in the A$$ and I probably won’t be doing that again to pre-treated furniture). Also, I don’t recommend doing this kind of project in an apartment. Yeah, definitely not a good idea *coughs on fumes*.


It’s still a WIP (work in progress) at this point. I need to clear-coat the entire piece, which needs to be done outside. I’m procrastinating on this step because, being a vintage piece, this beast is HEAVY. Once the clear-coat has set, I’ll plug in the new drawer pulls and post it up on etsy.
Anyone interested? Teeheehee…
……………………………………………………………………………..
Marble Glasses + Mugs
Most likely my last project for 2016, and *spoiler alert* to my friends and family who haven’t received their Christmas gifts from me yet!!!!! Maybe skip this part…


I had SO much fun with these!!! I will definitely do more of them and will post them up on etsy. Can anyone guess what media I used?!
Nail polish. WHAAAATT?!?!?
It’s no secret folks; any fellow Pinterest-er has most likely seen this. But while it’s been done before, I have to say I love the direction I went with it. I had only seen this technique on ceramic mugs prior to my attempts. I found these stemless wine glasses + all-purpose beverage glasses at the dollar store and had to try those out, too. I actually like the effect on the clear glasses much better than on the mugs, since you can see the design from both sides.
Maybe if you’re nice, I’ll make some for you 😉
……………………………………………………………………………..
Clearly, I had a good year! I found inspiration every where, and challenged myself with new and exciting projects (some of which are still in progress). I had success on etsy (someone in Australia is wearing one of my hats!) and hope to continue to grow my store and add new items. And most of all, I had fun creating and sharing my craft with my family and friends.
I can’t wait to get started on my next project and see what 2017 has in store for me. Happy New Year everyone!


![I'm dreaming of a white [and gold] Christmas.](https://thisgirlmakesthings.files.wordpress.com/2015/12/tree.jpg?w=306&resize=306%2C408&h=408#038;h=408 "tree")