
In celebration of the season (and my new domain name) I’m sending you this very special Christmas post and mini-tutorial.
I’ve been busy over here lately, but have had the opportunity to slow things down a bit and decorate. One of my most exciting accomplishments so far is my tree. This is the very first tree I’ve bought and decorated myself, outside of my family’s tree. And I’m so impressed 😉
![I'm dreaming of a white [and gold] Christmas.](https://thisgirlmakesthings.files.wordpress.com/2015/12/tree.jpg?w=306&resize=306%2C408&h=408#038;h=408 "tree")

I’ve been making little handmade ornaments all week and adding them to the tree. You can see the crocheted stars in the photo surrounding my “L” globe. I’ve also made a few little yarn pom-poms. It’s so easy to do and they look great on any themed tree, in any color.

Since I love my little pom-poms so much, I decided to make a mini-tutorial on how to make them. Now you can make your own!
To start out, you’ll need a pom-pom maker which you can make yourself. Yes, you can buy one. But you can buy ornaments, too, and where’s the fun in that?!
Materials: I’ve made several of these for different sized pom-poms and have used different materials. So far, the best material I’ve found is bendable, cuttable plastic. You can find this at hardware stores, craft stores, online, etc. But cardboard works really well too. You can even use the cardboard from a cereal box.
Making your pom-pom maker…..
Step 1: Cut out 2 identical circles from the material of your choosing. The size of these circles will be the size of your pom-pom. For large pom-poms, I trace an upended pint glass. For small pom-poms, I’ll trace a mason jar lid, the base of a champagne flute, or wine glass.
Step 2: Draw a smaller circle inside both large circles. Larger circle = Denser pom-pom. I personally like to leave half the diameter of the circle for wrapping. Let me explain: Say the diameter of your circle is 4″. Find the center point of your circle and measure out 1″. This distance from the center point will be where you draw your inner circle. It should look something like this:
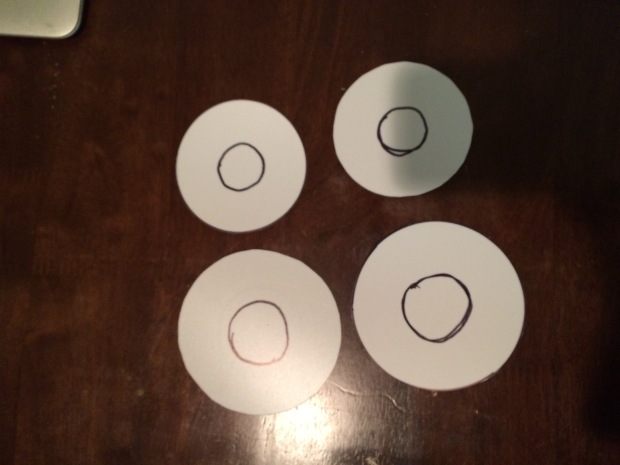
As you can see, I have two sets of pom-pom makers started. My inner circles are half the diameter of my outer circles.


Making your pom-pom ornament….
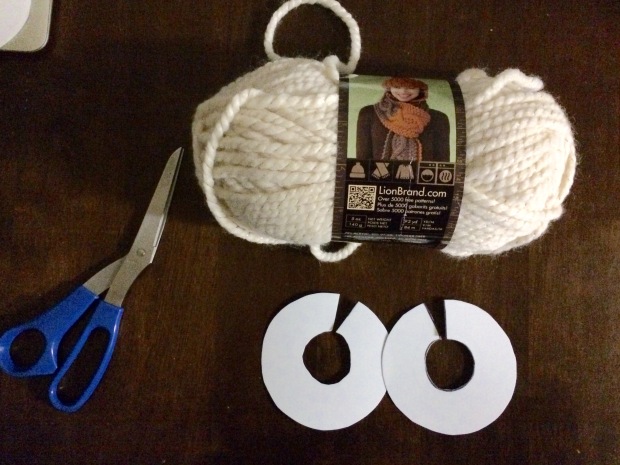
Here’s what you’ll need:
- Pom-Pom Maker
- Yarn
- Scissors
Step 4: Wrap the yarn. Place your two pom-pom makers together so they match up. You’ll be wrapping the yarn evenly around the donut you’ve created. The key word here is EVENLY. Start at the middle bottom of your pom-pom maker and wrap up to the “V” on one side. Then wrap back down towards the middle bottom, and then back up the other side to the “V”. Wrap back down to the middle bottom one more time, and this will give you your first layer. The more layers you wrap, the denser and fuller your pom-pom will be. Depending on the size of yarn I’m using, I’ll wrap anywhere between 3 -6 (or more) times.


Step 5: Cut out your pom-pom. Once you’ve wrapped to the thickness you prefer, cut the yarn leaving a small tail. Starting at one side of the “V” opening, separate the two pom-pom maker circles and insert the blade of your scissors. Cut through the yarn along the edge of the pom-pom maker all the way around the outside. This is when your pom-pom actually starts looking like a pom-pom!

Step 6: Tie your pom-pom. Cut a long piece of yarn, about 10 inches (if you have thin, dark green yarn, I’d use it here). Hold each end of the yarn and place the center of the strand in between the two pom-pom maker circles. Push the yarn down to the center of the pom-pom, and wrap both pieces around to the other side (keeping the yarn in between the circles). Tie them together in a very tight knot, them wrap them back up to the top and tie another tight, double knot. This secures the pom-pom yarns together and keeps your pom-pom from falling apart.


Step 7: Pull out your pom-pom. Carefully remove your new pom-pom from the pom-pom maker. Do NOT push it out through the center circle! Instead, bend the pom-pom maker and pop the pom-pom out through the widened “V” opening.

I’m holding one side of the circle back, and I’m popping the pom-pom out through that larger opening.
Step 9: Enjoy your pom-pom! Look what you did, how pretty! Make as many as you want for your tree, one is never enough. You can also make smaller ones for additional flare on your wrapped presents.


I hope you’ll make some lovely pom-pom ornaments for your tree this year. And when you hang them up, I hope you’ll be inspired to hand-make even more decorations for your tree and your home.
Merry Christmas, y’all!
